We ship to all Canadian provinces!

Language
DICHROIC GLASS

DICHROIC GLASS

DICHROIC GLASS

MOST INFO FROM HOWARD SANDBERG OF COATINGS BY SANDBERG

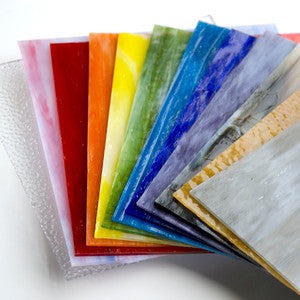
Dichroic glass is one of the most beautiful things SGE carries and it has been one of the most challenging. It was kind of nice to see on CBS page “the history of dichroic glass” that Howard says, “When you look at the history of an artist using Dichroic coated glass, it appears that the artist has been under the major handicap of not having any information on what he or she was working with. These artists were exposed to a piece of glass that had interesting color effects but came from a very complex and scientific industry not easily understood. These ‘high-tech’ coatings were capable of reflecting a narrow band of light (or one color) and at the same time, transmitting the remaining part of light.” So at least it was not just us facing challenges. I could go on about how the development of this metal film was done by our military and aerospace industries. The text would make your head hurt! It was 30 years (mid 70s) ago when CBS started production for art applications. When SGE first brought in some dichroic glass it was a big deal. We made a special display rack for it. We were displaying 1 piece that was about 2x4 inches of each one. We outgrew that fast! Then we would get questions about what it was going to do. We had some idea but not much. To complicate things, we didn’t even always know what we were getting. A customer would buy a piece that was rainbow or mixed and one part of the glass would behave one way and another part another way. Then our suppliers started to drill down and offer a standard stock and good descriptions. We changed our sku system and our descriptions to help our customers know what they were buying and to help us have them organized in a way that the customer could find what they wanted, and we would have a way to see gaps in our inventory and keep our stock consistent. About five years into stocking this glass we bought a shrink wrap machine. We bring in the glass, cut it, shrink wrap it and label it. No more ruined pieces from scratches and no more fighting to get the glue from the label off the glass. The only manufacturer we currently have is CBS.  Coatings by Sandburg.  Occasionally we see some Duncan (which has little designs like dragonflies on it) but not often. We stock both 90 and 96.  We also stock some 104 and 33 Coe for flame workers and glass blowers.  We also have dichroic frit flakes.  

.  

Read more
picture from Every Stained Glass

Tips from the Glass Academy: Lead Came or Copper Foil

The basic thing to remember here is that Lead Came stretches. That really is the base fact in deciding when to use what.

Use Foil:

1. Lamp Shades should always be done in foil. All those beautiful Tiffany Studio lamp shades were done with foil. He was the master so just do what he did! If you make a lamp with lead, over time it will collapse unless you reinforce the lead. That just adds to the work and to the weight.

2. Lead is heavy. If weight is an issue, use foil.

3. Items like jewelry boxes should be foiled. It is way easier to deal with the angles with foil.

4. When you have little pieces that will be lost in the lead, use foil. You can even mix. A lead came panel can have a section that is foiled. Most little projects are done with foil.

Use Lead:

1. When you are making a project that will be in the weather, use came. Came can be puttied/cemented to make it more weather tight.

2. Geometrical patterns lend themselves nicely to lead came.

3. Really large piece, like Church window are nice with lead came because of the size. The boldness of the came fits the size. To get the bold width with foil would be difficult and probably irregular. Came stays nice and uniform.

this picture from Alamy.com

4.  Little suncatchers are sometimes made with

hobby came, which is a tiny came.  Simple ones.  It is fast.  

4. Even though lead stretches, it takes time. Most Church windows do not need to be releaded for 100 years. When you see that a window is budging at the bottom, you can usually bet that it is old, and the lead has expanded and contracted over time and the weight of the glass has been pushing down during this unseen activity. If you used foil on a window that is exposed to weather and weight, you may see stress cracks in the glass.

Criteria Copper Foil Lead Came
Design Complexity Intricate, detailed patterns Simpler, larger geometric designs
Size of Project Small to medium pieces Larger panels or structural pieces
Structural Strength Lightweight, non-load-bearing items Heavier, load-bearing installations
Style Preference Thin solder lines, modern styles Bold lines, traditional styles
Read more
Award Made From SGE Glass

Award Made From SGE Glass

Olympia with award made from SGE glass. 
This is, of course, Olympia Snow in 2012 getting an award from the State Chamber of Commerce.  For many years, the State Chamber would come to Stained Glass Express and buy beautiful glass and take it to a framer to make these beautiful awards.  This is an award that certainly will stay on your wall on display because it is a work of art.  
Read more
Tips from Janet:   Know Your Tools—Pliers

Tips from Janet: Know Your Tools—Pliers

I just went to the retail display where we keep pliers.  There were 7 different ones.  So many pliers—so many uses!  Or just a little difference, like the width of the jaws that someone might prefer.  

Your first plier should be a breaker/grozer. Double duty! Their primary function is to grasp the glass securely on one side of a score when breaking it apart. Both jaws have serrated teeth to assist in their second duty, grozing.

Second pair you should buy is probably a running plier. This plier is designed to apply pressure under a score causing the break to follow (run) along the score line. Metal ones have the advantage of being adjustable for the thickness of the glass you are working with. Plastic also available.

Breakers. These have straight jaws and are designed to grasps the glass to assist in breaking long thin pieces of glass. The wide jaws meet only at the tip and not serrated.

Search: 30 results found for "pliers" – Stained Glass Express

Read more
Soldering Iron Temperature control

Soldering Iron Temperature control

Plugging a soldering iron into a rheostat (or temperature controller) does NOT reduce the temperature. It reduces the amount of electricity coming in but doesn't change the temperature the iron will heat up to. It will just take longer to heat up. It's the same as the tap on your sink. Turning the tap down will make the water come in slower, but the water will still fill up your sink. It'll just take longer to fill up.

1. Basic Concept of a Rheostat:

  • A rheostat is a variable resistor. It adjusts the resistance in a circuit, which in turn controls the current flow.
  • By increasing the resistance, the current flowing through the circuit decreases, which reduces the power delivered to the soldering iron.
  • Conversely, reducing the resistance increases the current flow, increasing the power to the soldering iron and therefore the temperature.

2. Operation with a Soldering Iron:

  • Input Voltage: When a soldering iron is plugged into the rheostat, the device controls how much of the mains voltage reaches the iron.
  • Power Control: Turning the rheostat's dial changes its resistance, altering the amount of current flowing through to the soldering iron’s heating element.
    • Higher Resistance = Less Power = Lower Temperature.
    • Lower Resistance = More Power = Higher Temperature.

The most popular iron right now is Hakko Fx601.  It comes with an internal thermostat.  A thermostat automatically maintains a set temperature.  That makes it way easier to learn to solder with a nice line.  If you don't have to constantly adjust for your temperature you will have an easier time.  

Hakko Soldering Iron FX 601 – Stained Glass Express

Not that there are not reasons for an iron with a rheostat.  One is price.  Not everyone wants to pay over $100 for an iron when they are first learning.  This person can buy an inexpensive 100-watt iron and hook it up to a rheostat and find out if they like the hobby. 

100 Watt Pro Soldering Iron – Stained Glass Express

Stained Glass Express

Read more
Glass No Longer Available.

Glass No Longer Available.

The tough economy of 2011 and 2012 caused some glass manufacturing to cease. The GNA (German New Antique) factory has now been closed for some time. At first it was thought that it would be retooled and reopened. That has not happened. As distributors run out, they will be gone. Colored Glue Chip has also disappeared.  We can still get clear but that is all.  Oceanside does manufacture a line of Artique glass which is quite beautiful and are great substitute for GNA.


 Grape Artique® Fusiblegna

 The green is glue chip, the blue is GNA and the purple is Oceanside's grape artique. 

 Wasser has also disappeared. This was a less commonly used   glass, but some have made beautiful, fused jewelry and plates   with it. It was a thin 90 Coe glass.  We also had a customer who made doll house items with this glass.


Kokomo Opalescent Glass had a series of difficult situations during and after the pandemic.  They are manufacturing glass,` but it continues to be very scarce and many of the numbers have not been seen in a number of years.   


  Camouflage OB 16"x16"Hawaiian Sunset OB 16"x16"

This is Camouflage, Hawaiian Sunset and Dragons' Breath which are hopefully going to be available soon.   


Read more
How To: Frame Stained Glass Panels using Zinc Came

How To: Frame Stained Glass Panels using Zinc Came

Intermediate / Advanced

How To:

Frame Stained Glass Panels using Zinc Came

"Came" is a channel made from a variety of metals and is available in various shapes. The two most commonly used metals used to manufacture came are lead and zinc. We carry multiple sizes of both Zinc Came and Lead Came on our website. Zinc Came is available in different widths. The wider the width, the stronger it is. Zinc Came is rigid and can be a challenge to cut. It lends itself well to geometric shapes. When used as a border for a stained glass panel, it will provide a nice clean, strong edge to that panel. Choose a width based on the look of your piece as well as the size. “U” Came / Capping Came is easier to work with but has little strength. Materials & Tools Needed:
  1. Your Stained Glass Panel
  2. Your choice of Zinc Came
  3. Your choice of hangers (we show Handy Hangers in this tutorial)
  4. Ceiling Tile or equivalent heat resistant work surface
  5. Push Pins (Straight Edges – Optional)
  6. Sharpie
  7. Ruler / Measuring Tool
  8. Fine toothed Hack Saw or Came Saw (Miter Box – Optional)
  9. Metal File
  10. (Masking or Electrical Tape - Optional)
  11. Soldering Iron, Stand, and Damp Sponge
  12. 60/40 Solder
  13. Flux and Flux Brush

Note: Click on photos to view them larger!

Note: Steps will not always happen in order, especially measuring and cutting. You will be going back and forth!

Measuring the Came: Cut a short piece (1” to 2”) of your Came to use as a marking gauge. Lay it over another piece of came (both pieces are laying on their side as though they were on a finished piece!) and mark the width of the gauge (both sides) onto the gauge came. Draw a diagonal from corner to corner of these marks. This will give you a 45° line to cut on.

Making an accurate mitered edge

Place a length of came on the bottom edge of your panel. Place your mitered gauge next to it so the end of the center channel lines up with the end of the glass panel. Mark the 45° angle onto the frame came piece.

Using gauge came to measure and mark frame cameAfter cutting, you can see the center channel lines up with the end of the glass panel

Cutting the Came: Note: After all this, you may find that a Miter Box will simplify this process! Place the blade of your saw over the cut line and saw straight down. Let the saw blade do the work, do not force the cut. Cut all sides and make allowances for hangers. Dress each cut with a file to remove any burrs and to fine tune the angle that you cut.

Filing the came

Look at that beautifully fitted mitered edge!

Hangers, Part 1: Plan ahead for what type of hanger you will use. We recommend Handy Hangers, which require a tiny modification to the top piece of zinc came. See the three-step photo below that shows a small notch filed off the top piece. When dry-fit together, the Handy Hanger will slide down into the side piece of zinc through that notch (note that it is shown flat in the second picture, and is then rotated sideways in the third photo to fit into the side.) Making room for a Handy Hanger Soldering the Zinc Came Frame: NOTE: Soldering Zinc requires more heat than copper foil. Dry fit the sides to your stained glass panel and secure in place with pins.

(Popsicle Sticks can be used as shims under the glass, if tipping is noticed.)

NOTE: Tape can be used to control/contain the solder. (If used, the tape must be stuck to the zinc prior to the flux application.) NOTE: Flux should be applied 1 joint at a time for best results. Side 1 : Solder each edge joint (all that are touching the side of the zinc came), working all the way around the 4 sides until all of the intersecting joints are soldered to the zinc came. Hangers, Part 2 : If using Handy Hangers, tin them and slide them into the notch you created. If using another hanging method, either make or prepare (modify) the hangers to fit into the vertical zinc channels. Tin the hangers and place them into the channels. They will be soldered in place at the same time as the corners are done. Corners : Apply a small amount of solder, using the chisel edge of the soldering iron, directly over the corner seam. Keep applying small amounts of solder in this manner until you see that it has penetrated the seam.

Details of angled soldering iron and finished and unfinished joints

Side 2: Carefully flip your panel and repeat the same process as Side 1. Finishing: Clean the panel thoroughly. If needed, oooo Steel Wool can be used on the Zinc Came to brighten it or remove oxidation caused by the flux. If you Patina your panel, your best results will be achieved by using “JAX” Pewter Black. Wax and hang. Cleaners and Polishing (stainedglassexpress.com) Note: Completed panels can be heavy. Use a chain or cable that will easily support its weight. Sources: Everything Stained Glass – Molly Frances Ezine Articles – Maurine Summy Living Sun Glass – Samantha Calder James A Veilleux Researched, Interpreted and Arranged By: James A Veilleux 04/05/2023
Read more
Here's How You Get Shiny Copper Patina

Here's How You Get Shiny Copper Patina

(example is from C Rhodes Glass Art on Esty) Don' you love how your piece looks when it is foiled before it is soldered? That shiny copper foil just sparkles. Why, oh why then, is it so hard to get copper patina to look as good as the copper foil. The simple answer is tarnish! A beautiful patina finish is always about how the metal is prepared and cleaned before you apply the patina. So here are a couple of tricks we use at Stained Glass Express to get that professional look for copper patina. 1. After soldering, clean your piece with patina and flux remover. Then rinse well with tap water. Dry all the solder lines with a paper towel so there is no tap water left on the piece. 2. When the piece is dry, mix a solution of 3 parts distilled water and 1 part ammonia. Scrub the solder lines and joints with fine steel wool (0000) dipped in the ammonia solution. Scrub until all of the solder is a consistent satin finish silver. 3. Dry the piece with a paper towel. It is important at this point not to use tap water because the additives or minerals in the water may react with the patina. 4. Dip a paper towel into the patina and rub it all over the piece to cover the solder lines. The patina should come out very shiny. If there are spots that are not shiny, that means there is still tarnish on the solder in those places. Repeat the process over those spots to correct the problem. 5. Dry the solder lines and the glass with another dry paper towel. Immediately apply polishing compound and follow the manufacturer's directions for the product.

Read more