$20 Flat Rate Shipping to Contiguous U.S.
Artist Spotlight: Mary Harris

Artist Spotlight: Mary Harris

Mary Harris is an artist from Wisconsin. She has a studio called Harris Art Glass. Mary came to my attention once before when she was winner in the Gallery of Excellence Art Competition at the Glass and Bead Show. This year she was a double winner in the same competition at the 2023 Glass and Bead Show. Below are her two winning entries.

Tree of Life

1st place popular vote

Professional Stained Glass

Under the Cherry Tree

1st place popular vote

Professional Mosaic

Below is a link to Mary’s website where you can see more of her amazing work. Portfolio | Harris Art Glass Glass Craft & Bead Expo | Las Vegas | Welcome! (glasscraftexpo.com) This is the link where you can go and see the other amazing entries in the Gallery of Excellence. Once you click on it go to the top and click on Gallery of Excellence. Red letters in the white bar.
Read more

How To: Frame Stained Glass Panels using Zinc Came

Intermediate / Advanced

How To:

Frame Stained Glass Panels using Zinc Came
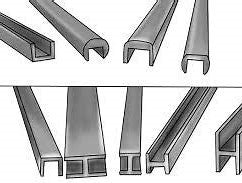
"Came" is a channel made from a variety of metals and is available in various shapes. The two most commonly used metals used to manufacture came are lead and zinc. We carry multiple sizes of both Zinc Came and Lead Came on our website. Zinc Came is available in different widths. The wider the width, the stronger it is. Zinc Came is rigid and can be a challenge to cut. It lends itself well to geometric shapes. When used as a border for a stained glass panel, it will provide a nice clean, strong edge to that panel. Choose a width based on the look of your piece as well as the size. “U” Came / Capping Came is easier to work with but has little strength. Materials & Tools Needed:
  1. Your Stained Glass Panel
  2. Your choice of Zinc Came
  3. Your choice of hangers (we show Handy Hangers in this tutorial)
  4. Ceiling Tile or equivalent heat resistant work surface
  5. Push Pins (Straight Edges – Optional)
  6. Sharpie
  7. Ruler / Measuring Tool
  8. Fine toothed Hack Saw or Came Saw (Miter Box – Optional)
  9. Metal File
  10. (Masking or Electrical Tape - Optional)
  11. Soldering Iron, Stand, and Damp Sponge
  12. 60/40 Solder
  13. Flux and Flux Brush

Note: Click on photos to view them larger!

Note: Steps will not always happen in order, especially measuring and cutting. You will be going back and forth!

Measuring the Came: Cut a short piece (1” to 2”) of your Came to use as a marking gauge. Lay it over another piece of came (both pieces are laying on their side as though they were on a finished piece!) and mark the width of the gauge (both sides) onto the gauge came. Draw a diagonal from corner to corner of these marks. This will give you a 45° line to cut on.
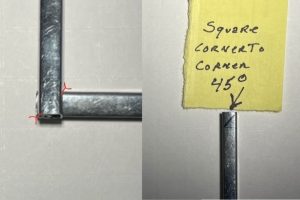
Making an accurate mitered edge

Place a length of came on the bottom edge of your panel. Place your mitered gauge next to it so the end of the center channel lines up with the end of the glass panel. Mark the 45° angle onto the frame came piece.

Using gauge came to measure and mark frame cameAfter cutting, you can see the center channel lines up with the end of the glass panel

Cutting the Came: Note: After all this, you may find that a Miter Box will simplify this process! Place the blade of your saw over the cut line and saw straight down. Let the saw blade do the work, do not force the cut. Cut all sides and make allowances for hangers. Dress each cut with a file to remove any burrs and to fine tune the angle that you cut.

Filing the came

Look at that beautifully fitted mitered edge!

Hangers, Part 1: Plan ahead for what type of hanger you will use. We recommend Handy Hangers, which require a tiny modification to the top piece of zinc came. See the three-step photo below that shows a small notch filed off the top piece. When dry-fit together, the Handy Hanger will slide down into the side piece of zinc through that notch (note that it is shown flat in the second picture, and is then rotated sideways in the third photo to fit into the side.) Making room for a Handy Hanger Soldering the Zinc Came Frame: NOTE: Soldering Zinc requires more heat than copper foil. Dry fit the sides to your stained glass panel and secure in place with pins.

(Popsicle Sticks can be used as shims under the glass, if tipping is noticed.)

NOTE: Tape can be used to control/contain the solder. (If used, the tape must be stuck to the zinc prior to the flux application.) NOTE: Flux should be applied 1 joint at a time for best results. Side 1 : Solder each edge joint (all that are touching the side of the zinc came), working all the way around the 4 sides until all of the intersecting joints are soldered to the zinc came. Hangers, Part 2 : If using Handy Hangers, tin them and slide them into the notch you created. If using another hanging method, either make or prepare (modify) the hangers to fit into the vertical zinc channels. Tin the hangers and place them into the channels. They will be soldered in place at the same time as the corners are done. Corners : Apply a small amount of solder, using the chisel edge of the soldering iron, directly over the corner seam. Keep applying small amounts of solder in this manner until you see that it has penetrated the seam.

Details of angled soldering iron and finished and unfinished joints

Side 2 : Carefully flip your panel and repeat the same process as Side 1. Finishing : Clean the panel thoroughly. If needed, oooo Steel Wool can be used on the Zinc Came to brighten it or remove oxidation caused by the flux. If you Patina your panel, your best results will be achieved by using “JAX” Pewter Black. Wax and hang. Cleaners and Polishing (stainedglassexpress.com) Note: Completed panels can be heavy. Use a chain or cable that will easily support its weight. Sources: Everything Stained Glass – Molly Frances Ezine Articles – Maurine Summy Living Sun Glass – Samantha Calder James A Veilleux Researched, Interpreted and Arranged By: James A Veilleux 04/05/2023
Read more
Tools for Effective Soldering

Tools for Effective Soldering

How to Effectively Solder

Stained Glass

By James Veilleux

Note: Soldering Stained Glass can be a fun but sometimes frustrating process. There is a definite learning curve involved but, with time and practice, the end result will be worth the effort. In order to even begin the soldering process, you need to have the right tools to successfully create a stained glass piece.

Below are the 7 essential items necessary to Effectively Solder Stained Glass

  1. Soldering Iron
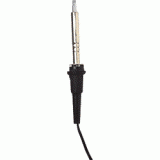
The soldering Iron is the most important tool that you will need to solder stained glass. The soldering iron is used to melt the solder that will fuse the foiled stained glass pieces together. It is important to use a high-quality soldering iron, preferably with a means of controlling the temperature, to make the soldering process successful and increase the soldering iron's longevity. The soldering iron should be hot enough to allow the solder to flow over the seam of the foiled glass pieces. Too much heat will allow the solder to pass through the seam and possibly crack the glass. Soldering Irons & Accessories (stainedglassexpress.com) soldering iron
  1. Solder
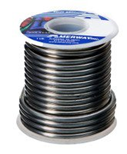
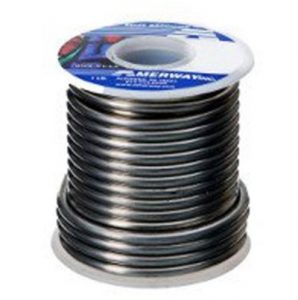
Solder is a metal alloy that is used to join metal parts together. Solder comes in different variations, but for stained glass, the best choice is a solid-core wire solder. However, you will need to choose the solder that works best for your project or piece. Solder is usually made of Tin and one or two other metals such as Lead, Copper, or Silver. Solder comes in both Lead and Lead-Free variations. Stained glass uses solid solder with an external flux. 60/40 Solder is typically used for stained glass projects. The first number is the percentage of Tin (SN) while the second number represents the percentage of Lead (PB). 50/50 Solder is sometimes used for certain applications and requires more heat to work due to the increased lead content. Solder (stainedglassexpress.com) roll of solderroll of solder
  1. Flux
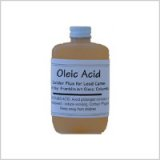
Flux is the chemical solution that is used to clean and join the metals. It helps the solder flow with the Copper Foil or Came. It is placed on the joint before the soldering begins to create a strong bond and hold. Flux comes in either a liquid, gel, or paste form. You will need to find a flux that works with your solder. Flux comes in different forms including Organic Acid, Water-Soluble, Inorganic and other forms. Never use directly from the original container in order to preserve the strength of the flux. Soldering Flux (stainedglassexpress.com) white bottle with blue lid contains flux oleic acid bottle white bottle with green lettering contains flux bottle with purple lid and label contains gel flux
  1. Sponge or Brass Wool
A Damp Sponge or Brass Wool specifically made for soldering is important to have on-hand to help while you solder to help preserve your soldering iron tips. When you solder a stained glass piece, you need to apply solder throughout the process or project. However, before adding any solder to your soldering iron, you need to clean the tip by lightly dragging it across a slightly damp sponge or inserting it into dry brass wool to remove the oxides and re-tin the tip. This needs to be repeated throughout the soldering process when you notice that the tip has oxidized (blackened). a rectangular yellow kitchen sponge
  1. Flux Applicator or Brush
A Flux Brush or Applicator (Q-Tip)is used to apply the Flux onto the metal areas to be joined. The Flux Brush can last a long time if rinsed at the end of each soldering session. If not rinsed, the flux will stay active and corrode the bristles and metal handle of the brush. Flux Brush 12 Pack (stainedglassexpress.com)
  1. Heat Resistant Surface
You will need a Flat, Burn-Resistant surface to work on your soldering project. This surface should allow pins to be used for the purpose of securing your stained glass project from movement. A ceiling tile is a good choice for this surface. Always use the unpainted side to work on.
  1. Gloves and Mask
If you are using Leaded Solder, it is important to wear chemical resistant gloves at a minimum. A Mask and Safety Glasses are recommended for protection from all flux fumes and solder splatter. We also highly recommend keeping Heavy Metal removing soap on hand at all times.

Credit for Info:

Amerway

Canfield

Novacan

Stellar Technical Products

Researched, Interpreted and Arranged By: James A Veilleux 03/08/2023
Read more

Glass Safety

SAFETY

June is National Safety month.

Hopefully it is not a surprise that we are an industry that should be tuned into our personal safety. Not only do we deal with lead, but we also deal with lots of dangerous chemicals.

FLUX

Flux is one of the worst we deal with. It contains acids, sometimes solvents and other chemicals. We heat it up and create fumes. If you are not careful, you will be breathing these fumes. Set yourself up with a fume trap or at the very least something that is blowing the fumes away from you.
Weller Fume Trap Smoke Absorber
It is a little tough to do as you don’t want to cool your solder prematurely. Every chemical has an SDS (Safety Data Sheet) that is readily available. If you are concerned about the flux you use, ask for the SDS or look it up online. You will have all (or more) the information you could possibly want.

SOLDER

Solder is made with lead (unless you are using lead-free). I don’t know anyone who wears gloves when soldering. People generally have the soldering iron in one hand and a strip of solder wire in the other. Lead is absorbed through your skin so that is the real health issue there. If you are not going to wear gloves, then wash your hands after use with heavy metal soap. Years ago, we had Safety Works in doing some safety testing for us. He told me to get the soap and have it at the sinks and then sell it and not be bashful about pushing it on people. They are touching lead and they need it! So, yes, we have it in our bathrooms and at our classroom sink and we sell it. So here it is. You need this so buy it and use it! Don’t eat where you solder. Just don’t. If you are making something that people are going to handle (jewelry, nightlight, boxes), use lead-free solder. We have gotten great feedback on this Amerway Tourmaline Lead Free Solder. It is the shiniest!

GLASS HANDLING

Stained glass people love to pick up a big sheet of glass and hold it over their head and look through it. DON’T DO THAT! If it breaks it is breaking into your open eyes! Don’t let glass slide down in your hands. That cut will need more than a band aid. In our retail store, we take care to push the glass into the display cubbies every day. We don’t put short sheets down into the record racks where people can skin their hands trying to get the pieces out. We put the taller glass to the back so people are not reaching over it. We are checking the scrap glass all the time as it is sharp and pointed. Wear glasses when cutting and grinding. Wear gloves for glass handling. Wear a dust mask when using glues and powders. This is supposed to be fun. Stay safe!
Read more
A Trip to the Morse

A Trip to the Morse

I recently visited The Charles Hosmer Morse Museum. It was my third trip, so that tells you something. The bonus was that I took my adult daughter, Soo, and she absolutely loved it. It is in Winter Park, Florida, just north of Orlando. Winter Park is a college town and has delightful shops and wonderful restaurants. We sat on the street and had broiled oysters with cheese and luscious drinks. It is the most comprehensive collection of the works of Louis Comfort Tiffany. Things you can see are Daffodils, the Four Season, Pumpkins and Beets. The glass is just unbelievable. Tiffany would make the glass for the piece that was being made so it is amazing. In addition to these individual works are two complete rooms from the Tiffany estate. The Tiffany Chapel is breathtaking. Laurelton Hall’s Daffodil Terrace, Reception hall, living room, dining room and smoking room. Price of admission? Most Fridays free. Other days $6.00 and less. If you are in Florida, don’t miss it.
Read more
Featured Artist-Remembering Fred Tenenbaum

Featured Artist-Remembering Fred Tenenbaum

A friend of mine on Facebook posted this a picture of sandblasted panel that is in his home. He said “do any of you remember the glass artist from Canaan, Me., Fred Tenenbaum? He did this panel." My response was, “I sure do, without Fred, Stained Glass Express would not exist." Time was, we owned a glass store in Winslow, Maine, named Oakes & Parkhurst Glass. It was a full-service glass shop offering commercial glazing, residential glazing, and auto glass. (O&P is now owned and operated by two of our children, Soo and Tobias.) I am not sure of the date but sometime in the early 1980s Fred came to us and asked if we could get stained glass. We brought in a small amount, made a small glass rack, and put it in the corner. As we expanded O&P Glass, we also put a small amount of stained glass and supplies for the stained glass artist/hobbyist in each of the other 5 locations (Belfast, Skowhegan, Farmington, Glenburn, and Manchester). Then in 1988 circumstances prompted us to buy a single location and make it good enough for all our customers to travel to. We bought and renovated a building in Waterville, Maine at 10 Railroad Square. By 2015, our son had bought O&P and the business we were doing in stained glass had totally outgrown that space. We moved to our current property in Manchester which is full floor to ceiling (it feels like!) with stained glass, fusible glass, specialty cabinet glass, tools of all the glass arts and trades, and so much more. All thanks to Fred's simple request 40 years ago! Fred was a very talented artist who did not only sandblasting but copper foil and lead came work. His studio was called Northern Lights Glass Studio. While writing this blog entry, I had not been having luck finding any more pictures of his work and was feeling disappointed. When I handed over the blog to be edited by our new Glass Academy Director, however, she recognized some of the names. (It is such a small world!) Within a few days I had been connected with Fred's widow, Eve. She sent me this photo of Fred's first ever piece, and I was moved to tears. Here is Fred's obituary, published on legacy.com by Central Maine on Jul. 31, 2018: "1941 - 2018 CANAAN - Fred Tenenbaum, 77, of Canaan, died peacefully at home surrounded by his family on July 27, 2018. Fred was born in St. Gallen, Switzerland, on May 14, 1941, and immigrated with his parents to Brooklyn, N.Y., as survivors of the Holocaust. He moved back to the land in Maine in 1970 where he spent nearly 50 years building a home with his wife, Eve, in Canaan. He was an accomplished stained glass artist, creating and restoring windows all over Maine and beyond as Northern Lights Stained Glass. He also taught at the Skowhegan high and technical schools for many years. He loved to garden and travel, he was a true crafts person and was loved dearly by all that knew him. Fred leaves his wife, Eve; daughters Marissa and Aliza, sons-in-law Rob and Mike; and four grandchildren." Edited on August 9, 2022 to add a photo of Fred's window at the Skowhegan Town Office and several other photos of his work, generously shared by Eve: Edited on October 24, 2022 to add more photos of Fred's beautiful work:
Read more
CONTROLLING YOUR SOLDERING IRON TEMPERATURE

CONTROLLING YOUR SOLDERING IRON TEMPERATURE

Temperature controllers are generally separate units that the iron plugs into. They are small, easy to use and relatively inexpensive.

It operates similar to a light dimmer switch. By dialing the control to a higher or lower setting, more or less electricity is fed to the iron. This increases or decreases the iron temperature, allowing the tip temperature to be controlled.

https://www.stainedglassexpress.com/Glass-Tools/Soldering-Irons-and-Accessories/soldering-iron-temperature-controller.html

Ceramic Heating Element Irons

A temperature control/iron combination offers you greater control and flexibility than a temperature controlled tip iron when working with different metals and solder mixes. Look for one that is at least 80 watts. Since the flow of electricity to the tip is consistent and never completely stops, encounters with cold spots are nearly eliminated.

Hakko Soldering Iron FX 601 (stainedglassexpress.com)

These irons are relatively new to the stained glass trade. They are made with highly efficient ceramic heating elements. Like a ceramic room heater, they produce a consistent temperature using less electrical wattage during operation. When initially heating and when reheating during "recovery" periods, they can draw a "burst" of power exceeding100 watts and then efficiently reduce electrical consumption, often below 60 watts, during the soldering process. The result is efficiency and economy.

A remarkable feature of ceramic heater irons is they generally reach operating temperature in less than 60 seconds. Of the three types of irons, the ceramic heater type best maintains consistent tip temperature.

Irons with Temperature Controlled Tips

These irons are supplied with an internal regulator in the tip that does not allow the iron to exceed a predetermined temperature. An example would be a 600°F tip. The iron heats to that temperature then "shuts off." When heat is required, the iron "turns on" again. Tips are available in predetermined temperatures up to 800°F. These irons are easy for beginners to use because the temperature is automatically maintained for you, however, as your skills increase, you may prefer to control the amount of heat yourself for different soldering situations. The limited amount of control may become frustrating as your soldering skills increase. With this type of iron you will likely encounter "cold spots" where the iron will not melt your solder. These cold spots occur when heat is being drawn out of the tip faster than it is being replenished. You will need an iron with a minimum of 100 watts.

The Weller 100 is one of these irons.

Stainless Steel Heater Technology

These are nice stable irons. Best to use them with a separate controller. The biggest advantage is if you drop this iron it does not have a ceramic element that is very easily going to break. These are little workhorses.

Weller SPG80 Soldering Iron (stainedglassexpress.com)

100 Watt Pro Soldering Iron (stainedglassexpress.com)

Read more

MURPHY'S LAWS FOR STAINED GLASS

(I would like to give credit for this, but I no longer know where I got it)

Solder Law: Hot solder looks exactly like cold solder.

Solder Law II: One lead joint will always be unsoldered.

Breakage Law: The number of bad breaks you get is directly proportional to the price of the glass.

Breakage Law II: The number of bad breaks is an opposite proportion to the amount of glass on hand.

Breakage Law III: The number of bad breaks is proportional to the distance from your supplier.

Law of Studio Geometry: Any horizontal surface is soon piled up.

Law of Focus: At the most difficult point in construction of any project, the phone will ring.

Law of Focus II: The moment your hands touch lead, flux or patina, extreme hunger pangs will commence.

Law of Commerce: Everyone knows someone who does glass....cheaper.

Replacement Law: The moment you replace a lost tool with a new one, you will find the original.

Installation Law: The time required to install is proportional to the number of people watching.

Installation Law II: The tool you desperately need is back at the studio.

Common Sense Law: There is no such thing as a clean stained-glass window.

Common Sense Law II: The number of people you did not know were listening is proportional to the severity of the swear word used.

Common Sense Law III: Everything takes longer than you think.

Common Sense Law IV: Deadlines are always closer than you thought.

Read more

SOLDER - WHY DIFFERENT ONES

60/40 60/40 solder is 60% tin and 40% lead. It stays in liquid stage longer, giving you more time to set a smooth bead. It melts at 372 to 374 degrees F. It solidifies at 361 degrees F. This is the most popular solder. Easy to use, consistent, smooth. 60/40 takes all patina great. https://www.stainedglassexpress.com/60-40-solder-1-lb.html 50/50 50/50 solder is 50% tin and 50% lead. It is more economical than 60/40. It has a higher melting point of 413 to 420 degrees F. It solidifies at 361 degrees F. https://www.stainedglassexpress.com/solder-50-50-1-lb.html 60/37 Fast setting or also called eutectic, which means it melts and solidifies at the same temperature. That means it stays where you put it. Great for decorative soldering. The melting temp is 361 degrees F. https://www.stainedglassexpress.com/63-37-solder-1-lb.html Lead Free - Do not be fooled. Lead certainly is the most toxic of the metals in solder. However, right behind lead is silver and antimony. Lead free melts at a higher temperature than lead solders which makes it more difficult to work with. Depending on the brand or type, the melting range is from 440 degrees to 482 degrees F. It is the least toxic of all the solders and should be used when making anything that will be in contact with the skin or handled often like jewelry, jewelry box or kaleidoscopes. Black patina works fine on lead free solder but copper patina does not. Some brands of lead free solder will have a satin finish, not the bright and shiny finish that most want. Amerway's Ruby and Emerald lead free solder do have the silver look. https://www.stainedglassexpress.com/lead-free-solder-1-lb.html
Read more

URO BY YOUGH

On May 7, 2020 Youghiogheny and Oceanside announced a partnership where Oceanside will continue with the Spectrum line and accessory glass and Youghiogheny will take on the manufacturing of the Uroboros line. It is exciting to have the Uroboros line again. With Youghiogheny manufacturing the Uroboros line, we not only will get the glass we will see more options in the accessory glass line. I am taking a leap here, but I believe that this collaboration will bring back the "96" term which Oceanside has not been using. Both companies are saying the System 96 brand will be back. That is exciting news. No question that Y-96, Oceanside and Uro fusible will be compatible.

Here is the official announcemnt.

Our industry is long overdue for an announcement of excitement and positivity, so we are pleased to be the bearer of good news. Youghiogheny Glass, together with Oceanside Glasstile, is announcing the acquisition and launch of Uro by Yough, a resurrection of the Uroboros line of both traditional art glass and 96 compatible fusible glass. The machines and all of the equipment have arrived at our Connellsville factory, and we are just about ready to start production. We would like to thank Oceanside Glasstile for approaching us with this opportunity. Their transparency and cooperation throughout the entire process has resulted in a second thrilling announcement; a collaborative resurrection of the System 96 brand of fusible glass and products including Oceanside Compatible, Uro by Yough, and Y96!! So what this means is that Youghiogheny Glass will produce URO by Yough and will collaborate with OGT to resurrect the System 96 brand. The new agreement will allow for the most comprehensive product selection of hand rolled art glass And a complete line of System 96 compatible fusing glasses and accessories. The last 5 years have been tumultuous. Our passion for glass and the industry drove us to fill product voids created from the upheaval and expand Youghiogheny's palette. We viewed this time as an opportunity for growth and expansion into the 96 fusible market with our Y96 product line, even though the future seemed uncertain. In less than a year from the release of Y96, we unveiled the True Dichro line of Art Glass. This had been a 10 year experiment and an outstanding breakthrough in art glass manufacturing science. This was quickly followed by a line of Textured Streaky Art Glass and then Art Glass Irids. Finally, we expanded color options in Y96, more than doubling the original offerings. At the end of 2019, we thought we had done it all. However, opportunity arose once again when we were approached by Oceanside GlassTile regarding Uroboros production and System 96. Youghiogheny has a long history of producing high quality, handmade sheet glass and is the ideal landing spot for the products previously produced by Uroboros. Our niche and strengths are the perfect complement to OGT’s continuous ribbon and accessory products in order to expand the System 96 palette. The name Uroboros Glass carries a heavy weight with us. The brand and legacy created by Eric Lovell is of the highest quality and held in the highest regard. We consider it an honor and great challenge to properly reintroduce Uro, by Yough. An undertaking of this magnitude for our company will be a challenge, one of excitement and optimism. This is an area where we ask for your help. Any insight that you can provide us with from your previous years of experience with the Uro line of glasses will be helpful. The expansive line of art glass, with the many combinations of colors and textures, has many products that are very similar or identical to items currently produced within our existing product lines. Uro by Yough is striving to recreate the most sought after products previously manufactured without creating duplicates of what is currently available. With your valuable input we will be able to determine a production starting point more quickly. We thank you for your continued support and loyalty and look forward to providing you with even more excellent products. Stay Well, Tristan and Leanne Triggs
Read more

Types of Glass

Other than basic opalescent and cathedral glass, there are further breakdowns of glass types under these two main headings. Opalescent is mixed with white and cathedral is see-through. Every manufacturer has its own variation of how it has handled these variations, so we end up with an industry filled with amazing options.

OPALESCENT

Opalescent glass was first developed and patented by John La Farge in 1879, but it was Tiffany who created the masterworks in glass using this type of glass. The Tiffany studio would often create a piece of glass just for the particular piece they were currently working on. So within this category, there are the following variants: Mixes. You can have a mix of one color and white. You can have a two- or three-color mix, or even a mix with more colors. The more colors that are mixed, however, the more difficult it is to not end up with a muddy glass. Mixing many colors with success is certainly a skill. Iridized. Many manufacturers were adding an iridized coating to their glass. This is very thin metallic coating that gives the glass a mother-of-pearl effect (or for those who don’t care for it, an oil-slick effect). Textured. There are many textures that can also be added to glass, such as flemish, granite, hammered, ripple, starburst, vertigo, corella classic and moss. Again, different manufacturers produce slightly different looks and may call them something different. Solid Opals. Glass that is a solid color.

CATHEDRAL

This glass has been around a long time. References as early as 675 A.D. talk about colored glass in buildings. Textured: There are many different textures of glass available. Some examples would be waterglass, reeded, English muffle, artique and Celtic. Streakys. This style of glass is still a bit see-through. Some color is mixed with clear.
Read more

Mind the Gap!

How close should your glass pieces be? They should be close enough so that you are comfortable with how heavy a solder line you will end up with. To help prevent uneven spaces, here are some hints:
  • Use push pins or jigs to hold your glass in place while building and checking the fit. That way, you won’t get one piece fitting perfectly as you are pushing another one out.
  • Make sure you have not flipped any glass over. Label your pieces to avoid this.
Before you say “good enough,” think about any holes or uneven spaces you are filling with solder. When your piece is held up to the light, those places will not let light through. They will become part of the design. Another problem is overheating the glass due to reworking it with a hot soldering iron. You don’t want to crack your glass with thermal shock because you are adding so much solder to fill the gap. Often when you are doing this, one side looks good and then you turn the piece over and there is a gob of solder. So you fuss with that, going back and forth, heating and heating, and then you hear the dreaded tink—the sound of glass cracking and your heart breaking! The best fix—sorry to say—is to recut. Be patient with yourself. This is a skill—so practice and don’t give up. Photo courtesy of Inland.
Read more
26 results