THE ART OF RESTORING GLASS
One of the very exciting things we get to do in this industry is to restore windows. These are generally from churches, and they are usually over 100 years old. It is just fascinating to see the beauty of these windows and the skill (they did not have the tools and equipment we have) it took to make these windows.
 One of these jobs was in 2008 when we had the privilege of restoring two windows from the First Congregational Church of Blue Hill. We were told the windows were originally made by Alfred E. Bell, a renowned stained glass artist of the 1800s. These windows were 6’ by 12’ and were exceptionally heavy because they were all plated. Each piece was at least two layers thick, and some were three layers thick. That created some interesting challenges in the restoration.
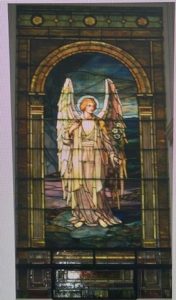
Another exciting job we did was a window called the Traveling Angel. It was from the Fairfield United Methodist in Fairfield Center, Maine. This window was made by the Belcher Glass company based in New Jersey. It was a unique process. It involved placing tiny pieces of glass on a paper pattern. When I say tiny, I mean like fingernail size! The pieces of glass and the pattern were then covered on both sides with a gummed sheet of asbestos. A frame was placed around the outside edges of the glass-filled asbestos sheets to seal the glass. Molten lead was then poured between the asbestos sheets, filling the gaps between the small pieces of glass. When the metal cooled, it bound the glass pieces together.
There were very few of these windows made because the process was toxic, and the workers died! There are approximately 30 of these windows in existence.
One of these jobs was in 2008 when we had the privilege of restoring two windows from the First Congregational Church of Blue Hill. We were told the windows were originally made by Alfred E. Bell, a renowned stained glass artist of the 1800s. These windows were 6’ by 12’ and were exceptionally heavy because they were all plated. Each piece was at least two layers thick, and some were three layers thick. That created some interesting challenges in the restoration.
Another exciting job we did was a window called the Traveling Angel. It was from the Fairfield United Methodist in Fairfield Center, Maine. This window was made by the Belcher Glass company based in New Jersey. It was a unique process. It involved placing tiny pieces of glass on a paper pattern. When I say tiny, I mean like fingernail size! The pieces of glass and the pattern were then covered on both sides with a gummed sheet of asbestos. A frame was placed around the outside edges of the glass-filled asbestos sheets to seal the glass. Molten lead was then poured between the asbestos sheets, filling the gaps between the small pieces of glass. When the metal cooled, it bound the glass pieces together.
There were very few of these windows made because the process was toxic, and the workers died! There are approximately 30 of these windows in existence.
 This picture shows a glazier, Lisa Lucas, from Oakes & Parkhurst Glass helping us reinstall the window after we flattened the curve in it, fixed the painted the face and did some other repairs including rebar to strengthen it.
 For the first time we offered a class in restoration! It seems there are more pieces of glass to be restored than the time and people to do it. We hope that some of the students will continue to work on their skills and eventually start taking on restoration jobs.
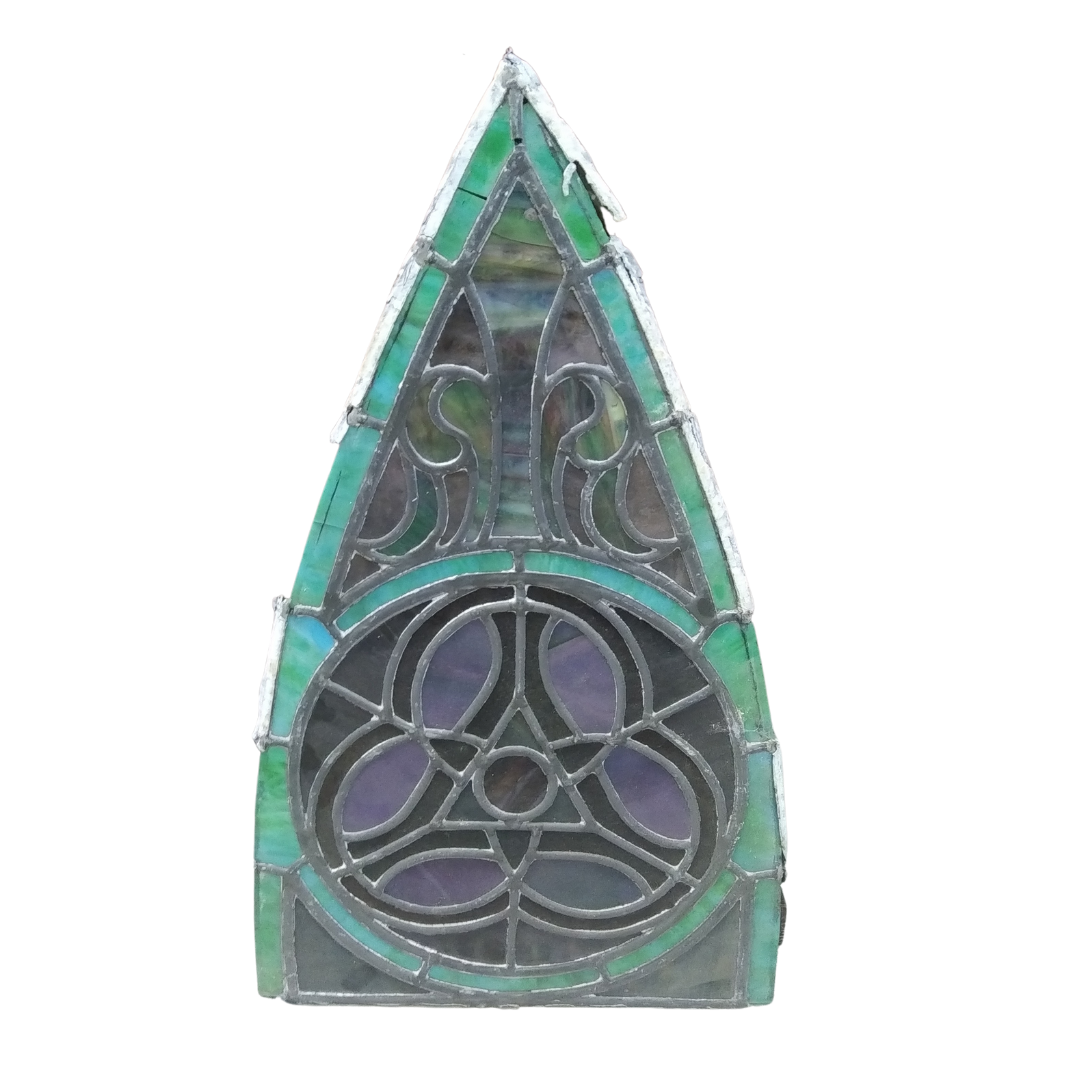
The pieces they restored were likely originally installed in the old Methodist Church in Fairfield, Maine (though that building burned long ago and their provenance is not definite.) There were eight panels in various states of decay, and some of them were missing several pieces of glass. They were also each unique, despite being a "matched" set. Some had round faceted crystals in the design, and all had slight variations in glass color. It was an intensive process that took some students weeks to complete. Here you can see some of the detailed steps, the immense satisfaction of a completed project, and 3 very different final interpretations of the restored windows.
For the first time we offered a class in restoration! It seems there are more pieces of glass to be restored than the time and people to do it. We hope that some of the students will continue to work on their skills and eventually start taking on restoration jobs.
The pieces they restored were likely originally installed in the old Methodist Church in Fairfield, Maine (though that building burned long ago and their provenance is not definite.) There were eight panels in various states of decay, and some of them were missing several pieces of glass. They were also each unique, despite being a "matched" set. Some had round faceted crystals in the design, and all had slight variations in glass color. It was an intensive process that took some students weeks to complete. Here you can see some of the detailed steps, the immense satisfaction of a completed project, and 3 very different final interpretations of the restored windows.


 Want to be notified when we publish a new blog post? Sign up Here

 One of these jobs was in 2008 when we had the privilege of restoring two windows from the First Congregational Church of Blue Hill. We were told the windows were originally made by Alfred E. Bell, a renowned stained glass artist of the 1800s. These windows were 6’ by 12’ and were exceptionally heavy because they were all plated. Each piece was at least two layers thick, and some were three layers thick. That created some interesting challenges in the restoration.
Another exciting job we did was a window called the Traveling Angel. It was from the Fairfield United Methodist in Fairfield Center, Maine. This window was made by the Belcher Glass company based in New Jersey. It was a unique process. It involved placing tiny pieces of glass on a paper pattern. When I say tiny, I mean like fingernail size! The pieces of glass and the pattern were then covered on both sides with a gummed sheet of asbestos. A frame was placed around the outside edges of the glass-filled asbestos sheets to seal the glass. Molten lead was then poured between the asbestos sheets, filling the gaps between the small pieces of glass. When the metal cooled, it bound the glass pieces together.
There were very few of these windows made because the process was toxic, and the workers died! There are approximately 30 of these windows in existence.
One of these jobs was in 2008 when we had the privilege of restoring two windows from the First Congregational Church of Blue Hill. We were told the windows were originally made by Alfred E. Bell, a renowned stained glass artist of the 1800s. These windows were 6’ by 12’ and were exceptionally heavy because they were all plated. Each piece was at least two layers thick, and some were three layers thick. That created some interesting challenges in the restoration.
Another exciting job we did was a window called the Traveling Angel. It was from the Fairfield United Methodist in Fairfield Center, Maine. This window was made by the Belcher Glass company based in New Jersey. It was a unique process. It involved placing tiny pieces of glass on a paper pattern. When I say tiny, I mean like fingernail size! The pieces of glass and the pattern were then covered on both sides with a gummed sheet of asbestos. A frame was placed around the outside edges of the glass-filled asbestos sheets to seal the glass. Molten lead was then poured between the asbestos sheets, filling the gaps between the small pieces of glass. When the metal cooled, it bound the glass pieces together.
There were very few of these windows made because the process was toxic, and the workers died! There are approximately 30 of these windows in existence.
 This picture shows a glazier, Lisa Lucas, from Oakes & Parkhurst Glass helping us reinstall the window after we flattened the curve in it, fixed the painted the face and did some other repairs including rebar to strengthen it.
 For the first time we offered a class in restoration! It seems there are more pieces of glass to be restored than the time and people to do it. We hope that some of the students will continue to work on their skills and eventually start taking on restoration jobs.
The pieces they restored were likely originally installed in the old Methodist Church in Fairfield, Maine (though that building burned long ago and their provenance is not definite.) There were eight panels in various states of decay, and some of them were missing several pieces of glass. They were also each unique, despite being a "matched" set. Some had round faceted crystals in the design, and all had slight variations in glass color. It was an intensive process that took some students weeks to complete. Here you can see some of the detailed steps, the immense satisfaction of a completed project, and 3 very different final interpretations of the restored windows.
For the first time we offered a class in restoration! It seems there are more pieces of glass to be restored than the time and people to do it. We hope that some of the students will continue to work on their skills and eventually start taking on restoration jobs.
The pieces they restored were likely originally installed in the old Methodist Church in Fairfield, Maine (though that building burned long ago and their provenance is not definite.) There were eight panels in various states of decay, and some of them were missing several pieces of glass. They were also each unique, despite being a "matched" set. Some had round faceted crystals in the design, and all had slight variations in glass color. It was an intensive process that took some students weeks to complete. Here you can see some of the detailed steps, the immense satisfaction of a completed project, and 3 very different final interpretations of the restored windows.

 Want to be notified when we publish a new blog post? Sign up Here