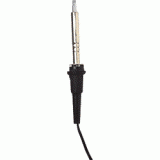
Soldering Iron Maintenance
TAKE CARE TO MAKE IT LAST--SOLDING IRONS
Ending up with a great looking project so often depends on your soldering. Having skill at soldering is one thing and caring for your soldering equipment is another.
The part of your iron most apt to cause trouble is the tip. If the tip develops a crack or a hole, that is the end. It will just disintegrate. To make your tip last, keep it tinned to prevent oxidation. A clean tip will give you better heat transfer. Even if you are done for the day, tin the tip. That will keep air away and keep oxidation away.
It is important. The first thing is to keep the tip tinned. Tinned means keeping it coated with a layer of solder. This will keep your tip intact and make your solder melt and flow evenly and smoothly.


Hakko FS 100 Soldering Iron Tip Cleaner
To tin the tip
Heat up the iron
Wipe the heated iron over your sponge or other cleaner you may be using.
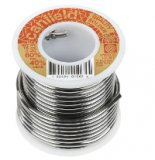
Apply solder to the tip and allow it to coat the surface.
Wipe off the excess on your sponge.
Another useful supply for cleaning your tip is sal ammoniac. It is made of ammonium chloride, comes in a block and is great for cleaning your iron. You still need to tin it.

One simple maintenance tip is loosen your tip routinely and make sure it is not getting stuck in the barrel.
Despite your best efforts, you may have to replace your iron. The cheaper the iron the quicker it will need to be replaced. Crafters new to the craft may have purchased a low-cost iron not knowing if they will stick with it. Most of these have a short warranty and pretty much last the length of the warranty. Most often, parts are not available for the cheaper irons. Once they are not working correctly—time to go.
If you have a higher quality iron, and it is not working properly, you may want to replace it. Some have ceramic elements and if you drop the iron the element can break and it will stop working. They are replaceable, but I hear it is a lot of work. If you like to do that sort of thing, it probably is worth getting the parts and making the repair.
If your tip gets frozen in the barrel you are pretty much done. You will probably need a new iron.
If your power cord is damaged, you should get a new iron. It may stop working and if it continues working it is dangerous.